Your team powers the calendar: bookings, availability and payroll all start from the employee record and its schedule. Each team member is a user account — an email to sign in with, a role that decides what they can see and do, and the stores they work in. This page is usually managed by an owner or manager; you need permission to manage staff to open it.
Before you add anyone, make sure the pieces they'll be attached to already exist: at least one role (see Roles & permissions) and the stores they'll work in. Both are chosen from lists on the form, so if a role or store is missing, create it first.
Step 1 — Open Employees
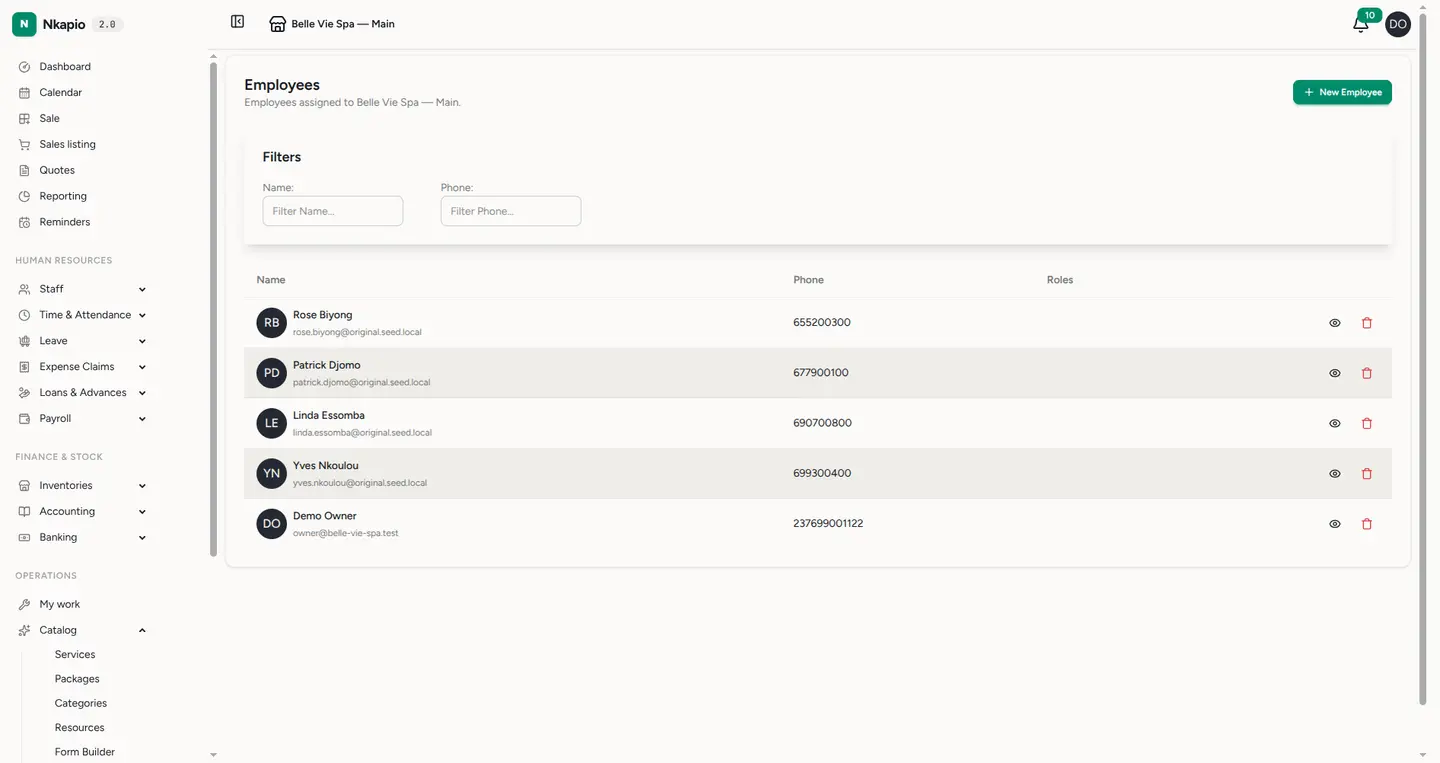
In the sidebar, expand Staff and open Employee. The list shows every team member with their role and status. From here you can review who has access and open anyone's record to edit it.
Step 2 — Add a team member
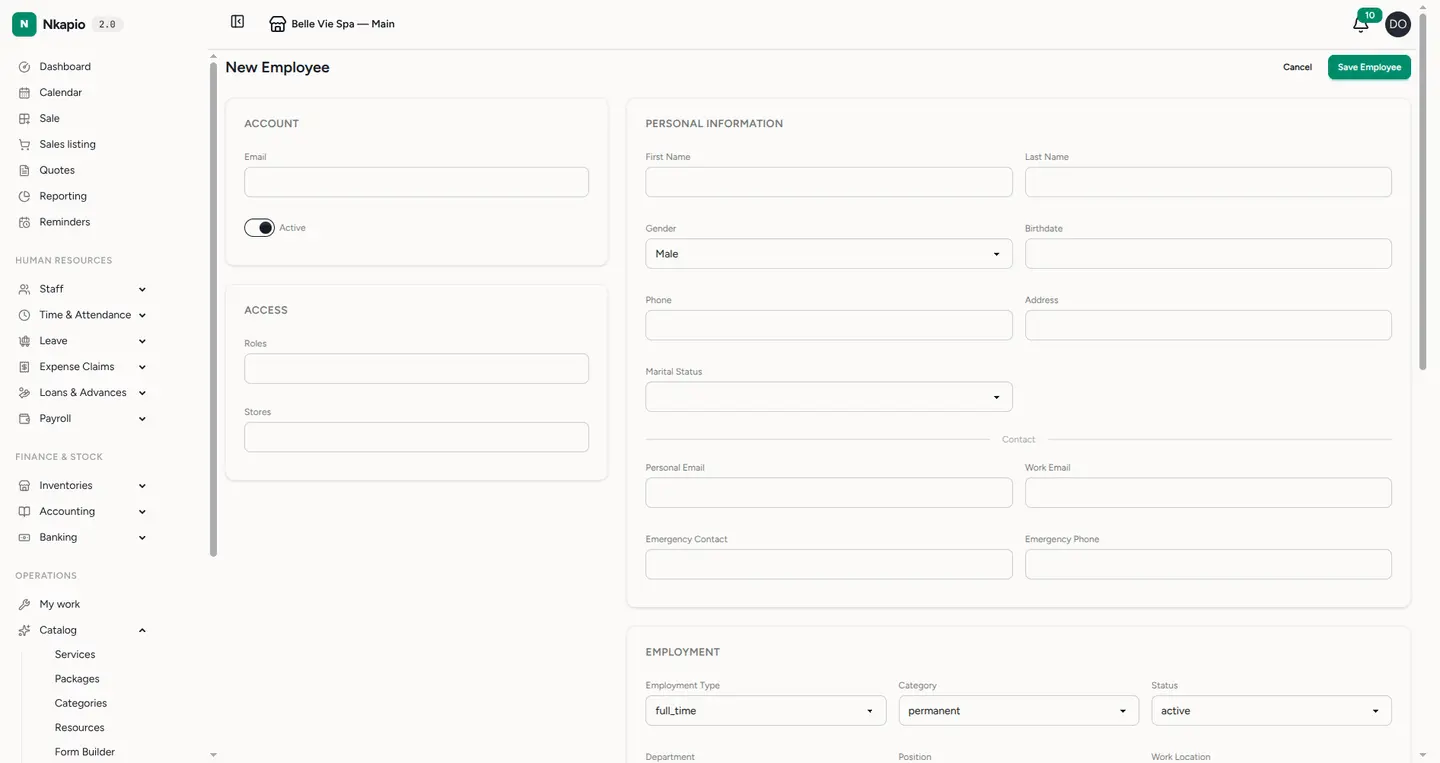
Click the new-employee action. The essentials are grouped near the top:
- Account — their sign-in email and an Active toggle. Inactive accounts are kept for the record but can't sign in.
- Access — one or more Roles (what they can see and do) and the Stores they belong to. A person can hold several roles and work across several stores.
The rest of the form — personal details, employment (type, department, position, hire date), compensation and banking — is optional and can be filled in later. When you save, Nkapio creates the account and emails the person an invitation to set their own password; they can't sign in until they confirm it, so you never handle their password directly.
Step 3 — Plan their schedule
Working hours come in two layers, which keeps them reusable:
- Work Schedules are templates. A work schedule has a name, weekly hours, an optional grace period, and a day-by-day configuration — for each working day you set a start time, a duration and a break. Build one per pattern you use (for example a full-time week or a weekend shift) and reuse it across the team.
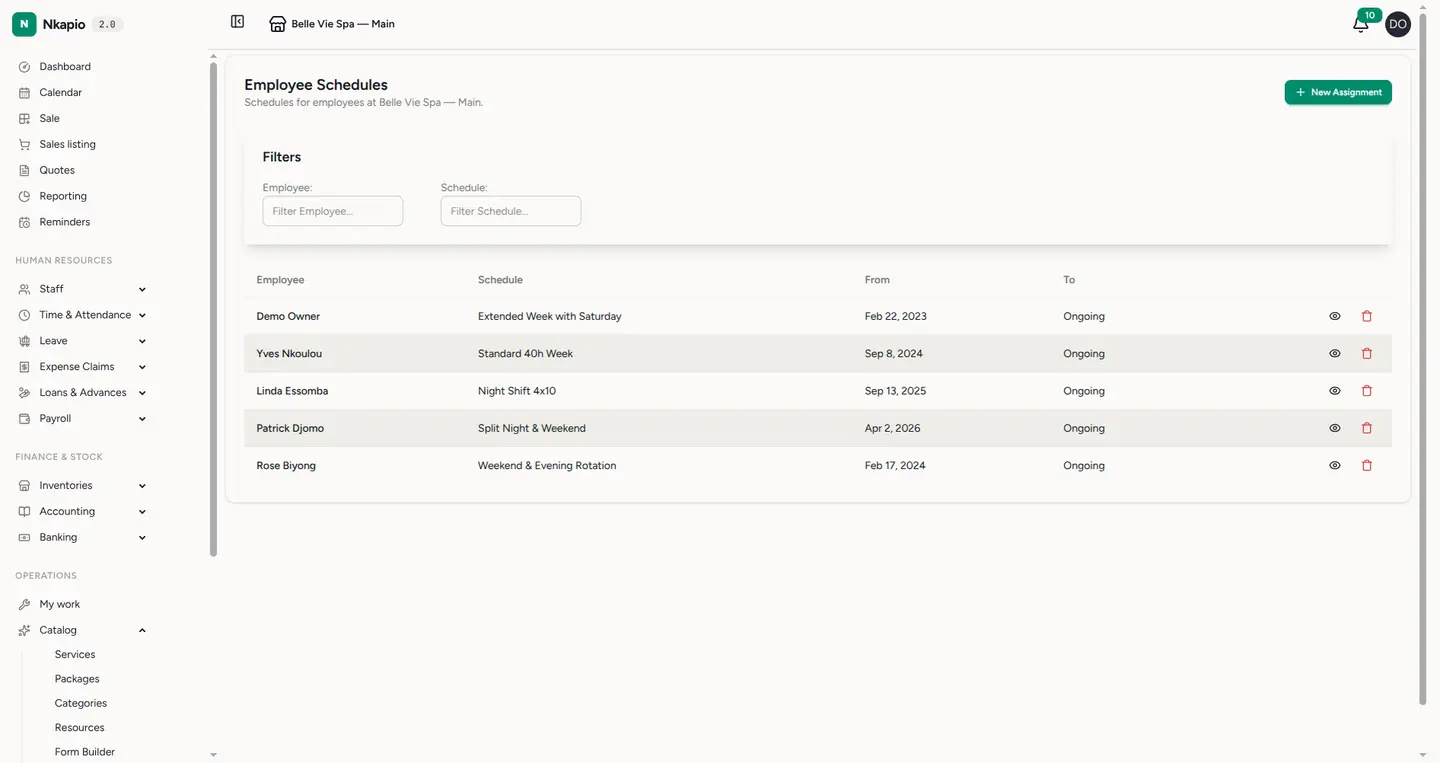
- Employee Schedules assign a work schedule to a specific person for an effective-from date (and an optional effective-to). This is where a template becomes that person's real hours.
Open Employee Schedules to make an assignment: pick the employee, pick the work schedule, and set the effective dates. The calendar then reads each person's active schedule to know their working window for every day — start time plus duration — and treats days with no working hours as off. That's how availability appears on the calendar and how out-of-hours bookings get flagged.
Tip: schedules also feed Time & Attendance and payroll — one source of truth for hours.
Tips & FAQ
- A staff member shows no availability. They likely have no active employee schedule covering that date. Assign one, or check the effective-from/to dates.
- The employee isn't in the schedule dropdown. The list only shows people assigned to the current store — add the store to their record first.
- Overlap error when saving a schedule. A person can have only one active schedule covering a given period. Close the old one with an effective-to date before starting a new one.
- Changing an existing schedule re-checks upcoming bookings, so you'll be warned if a change clashes with work already on the calendar.