Nkapio's form builder lets you create custom forms to gather the information you need from clients — intake details before an appointment, consent before a procedure, satisfaction surveys after a visit, or any structured data your business keeps on file. You design the form once, decide when it should be filled, and either attach it to a service or send it to a client to complete by link or QR code.
Forms are part of your catalogue, so the module is available wherever the catalogue is enabled. Anyone with permission to manage forms can build and edit them; the people who fill them are usually your clients, or staff capturing details on their behalf.
How a form is structured
Every form is organised into three levels:
- Sections group related questions and can carry their own title and description — for example "Contact details", "Medical history", "Consent".
- Questions live inside sections. Each question has a type, and can be marked required, given help text or a placeholder, and set to a full-, half-, or third-width column so the layout reads cleanly.
- Options apply to choice-style questions (the answers a client can pick from).
The available question types are:
- Text input — a single line, with optional minimum and maximum length.
- Long text — a multi-line answer for notes or descriptions.
- Checkbox — a single yes/no tick, useful for consent lines.
- Multiple choice — pick one or several from a list of options.
- Dropdown — pick one from a list, kept compact.
- Date and Date & time — captured with the standard picker.
- Yes / No — a quick two-way answer.
- Table — a small grid with configured columns for repeated rows.
- File upload — attach documents or images, with a size limit and allowed file extensions.
- Info block — display-only text (an instruction or notice), not an answer field.
Step 1 — Open the Forms module
From the sidebar, click Forms. The list shows every form you've built, along with how many services each is linked to and how it has been used recently.
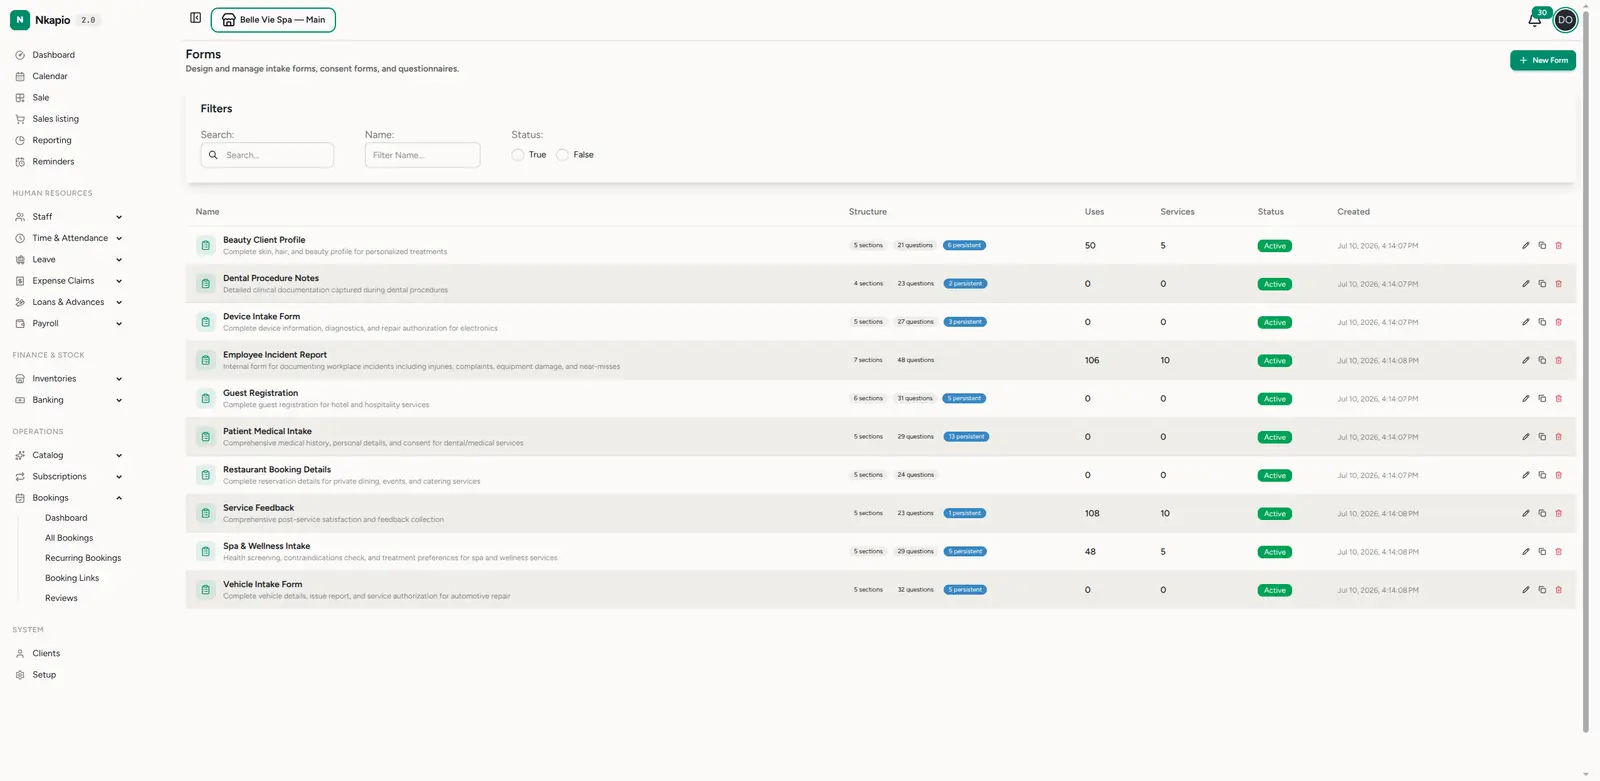
Step 2 — Create a new form
Click the button to create a new form. This opens the builder, where you give the form a name and description and start adding sections and questions. A new form starts out inactive — you publish it once it's ready (see the gotchas below).
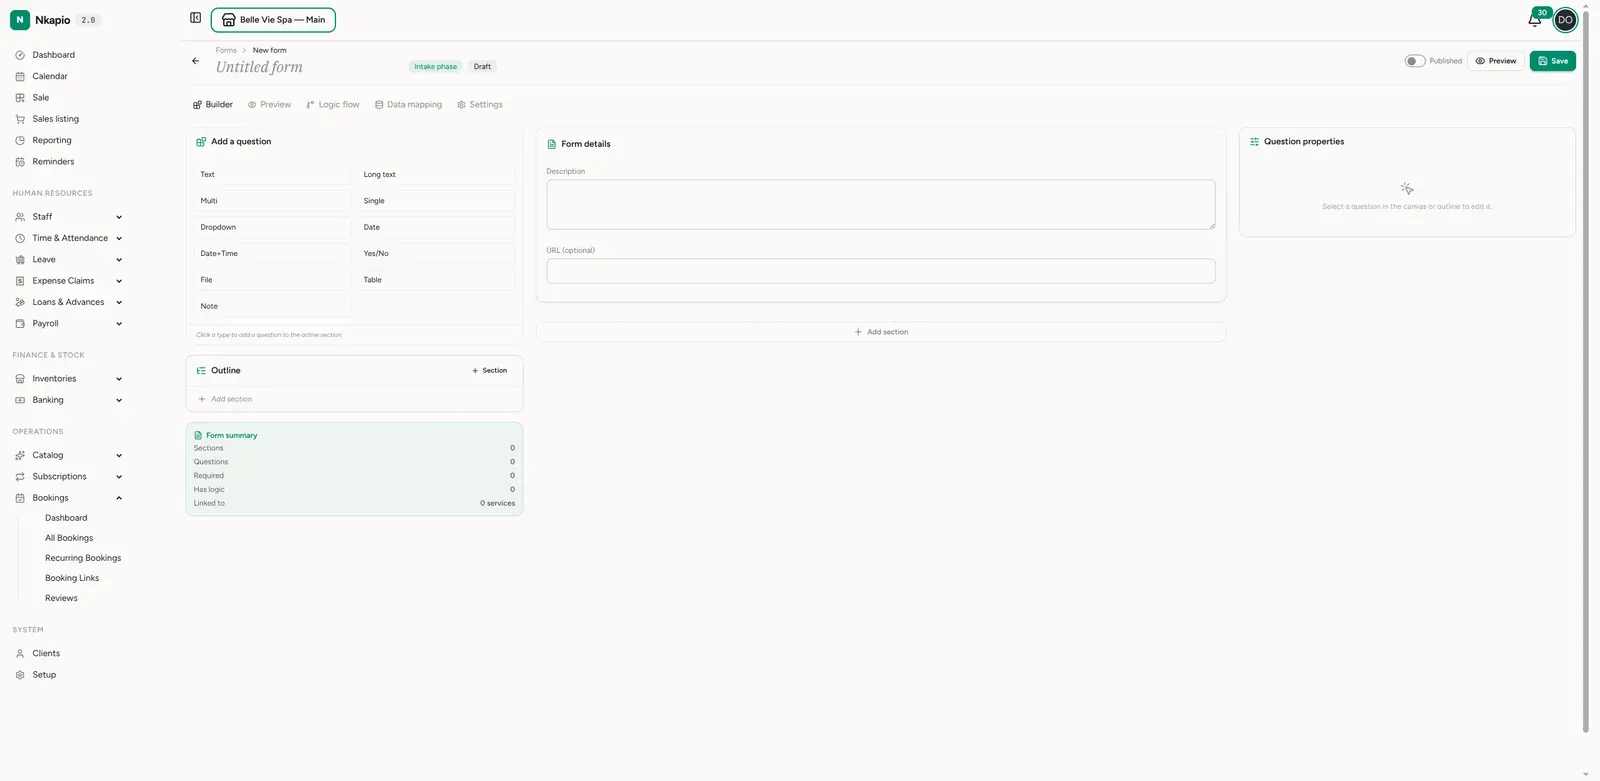
Step 3 — Add sections and questions
Add a section, then add questions to it and choose each question's type from the palette. For each question you can set whether it's required, add help text, set length limits on text answers, and choose its column width. Choice questions let you list the options a client can pick from, and file-upload questions let you cap the file size and restrict which file types are accepted.
As you build, the Preview tab renders the form exactly as a client will see it, and you can switch between tablet and phone widths to check the layout on smaller screens.
Step 4 — Add conditional logic (optional)
You can show or hide a question based on how an earlier question was answered. A rule points at another question, chooses an operator, and — for most operators — sets a value to compare against. The available operators are Equals, Does not equal, Contains, Is any of, Greater than, Less than, Has any value, and Is empty. When a question has several rules you decide whether all of them must match or any one of them.
One constraint keeps forms fillable top to bottom: a rule can only reference a question that appears earlier in the form. The builder blocks a rule that points at a later question or one that doesn't exist. The read-only Logic Flow tab visualises these conditional chains so you can see at a glance which answers reveal which questions.
Versioning — editing a live form
Every time you save structural changes, Nkapio stores an immutable snapshot as a new version. This matters because submissions already collected keep the version they were filled against — so if you reword a question or drop one next month, the answers your clients gave last month still read against the form as it stood then. You get a clean audit trail without breaking historical records.
The Settings tab shows the version history, where you can Compare a past version against the live form or Restore an earlier version as a draft. Toggling form-level settings — the phase, the "skip if already filled" window, or whether clients can edit their answers — does not burn a version; only changes to the sections and questions do.
Attaching a form to a service and requesting it
A form's phase decides when it's meant to be filled — at booking, at intake (check-in), during the service, or as a follow-up afterwards. You can set a default phase in the form's Settings tab.
To put a form to work, attach it to a service from that service's edit page, where you mark it required or optional, can override the phase for that specific service, and set who may see it. See Create and organize services for where those settings live. When a booking reaches the relevant phase, Nkapio can raise a request for the client to fill the form.
Each request generates a unique link — shareable directly or as a QR code — so a client can open and complete the form without logging in. If the client has already filled the form recently, you can have Nkapio skip re-asking within a window you set (for example, "skip if already filled this year").
Where submissions live
Completed forms appear under Form Submissions. The list shows each submission with its form and status; open one to read every answer as it was submitted. Because each submission is tied to the version it was filled against, what you see always matches the form the client actually saw.
Before you start — prerequisites and gotchas
- Permission and module — you need permission to manage forms, and the catalogue/forms capability must be enabled for your workspace. If the Forms item isn't in your sidebar, that capability is off.
- Publish before use — a new form is inactive until you activate it. An inactive form won't be offered to clients even if it's attached to a service.
- Required questions block submission — a client can't submit until every required question is answered, so reserve required for information you genuinely can't proceed without.
- Editing a live form creates a new version — that's by design and protects past submissions, but it means the form clients see going forward reflects your latest save. Use Preview before saving.
- Conditional rules must reference earlier questions — if a rule won't save, check that the question it points to sits above it in the form.
- Plans may cap the number of forms — if you hit a limit when creating a form, that's your plan's form allowance.
Tips
- Duplicate instead of rebuilding. If you need a variant of an existing form, duplicate it and adjust — the copy comes in inactive so you can finish it before publishing.
- Use Info blocks for instructions. They keep guidance and legal notices in the form without asking for an answer.
- Group with sections. A long form reads far better split into a few clearly-titled sections than as one long list.
- Set sensible field widths. Short answers (a phone number, a date) sit neatly at half or third width, keeping the form compact.
Frequently asked questions
Will editing a form change answers clients already gave? No. Existing submissions keep the version they were filled against, so past answers are never rewritten by a later edit.
Can a client fill a form without an account? Yes. A form request produces a link (also usable as a QR code) that opens the form directly, no login required.
Can I stop asking a returning client the same intake questions every visit? Yes — set a re-prompt window in the form's Settings so Nkapio skips it if the client filled it within that period.