Your business settings are the reference every other part of Nkapio reads from. Invoices, quotes and receipts, the calendar, reports, taxes and payroll all pull their identity, formats and defaults from here. Fill them in once, right after your first sign-in, and the rest of the app behaves the way your business expects.
These pages sit behind the Setup menu and are meant for the account owner or a teammate whose role includes settings access. If a colleague can't see or save a settings page, it's because their role hasn't been granted the settings permission — the owner can enable it from Setup › Team & Roles.
Step 1 — Open Setup
In the sidebar, scroll to the bottom and click Setup. The menu gathers everything that configures the workspace: your account, company, stores, taxes, discounts, payment types, localisation, invoicing and more. Each entry opens its own page, and you can come back to fine-tune any of them at any time.
Step 2 — Fill in your company details
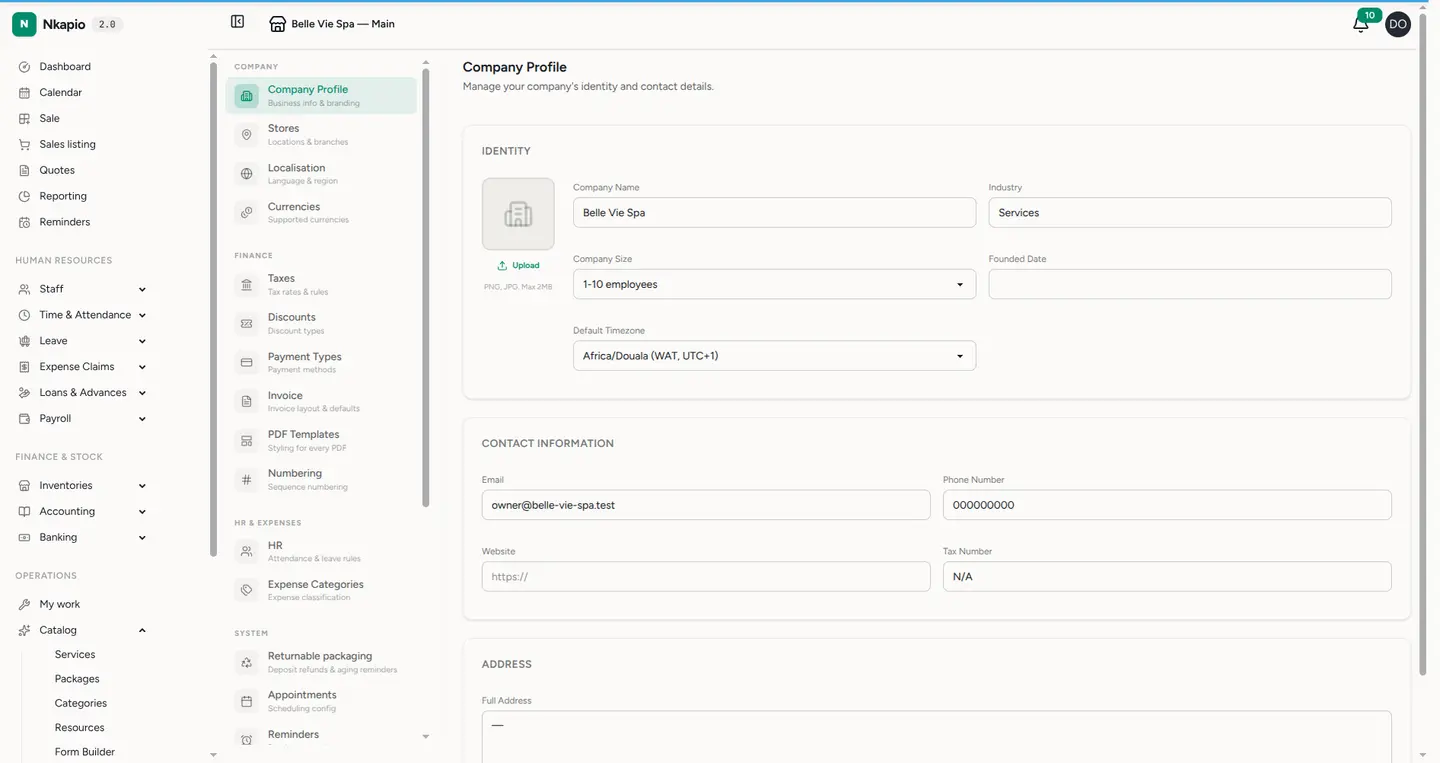
Open Company. This is your business identity, grouped into three cards:
- Identity — company name, industry, company size, founded date, a default timezone, and your logo. Upload a PNG, JPG or WebP up to 2 MB; the logo is what prints at the top of your documents.
- Contact information — email, phone number, website and tax number.
- Address — your full address.
Everything here appears on the invoices, quotes and receipts you issue, so it's worth getting the legal name, tax number and address exactly right.
Step 3 — Check your localisation
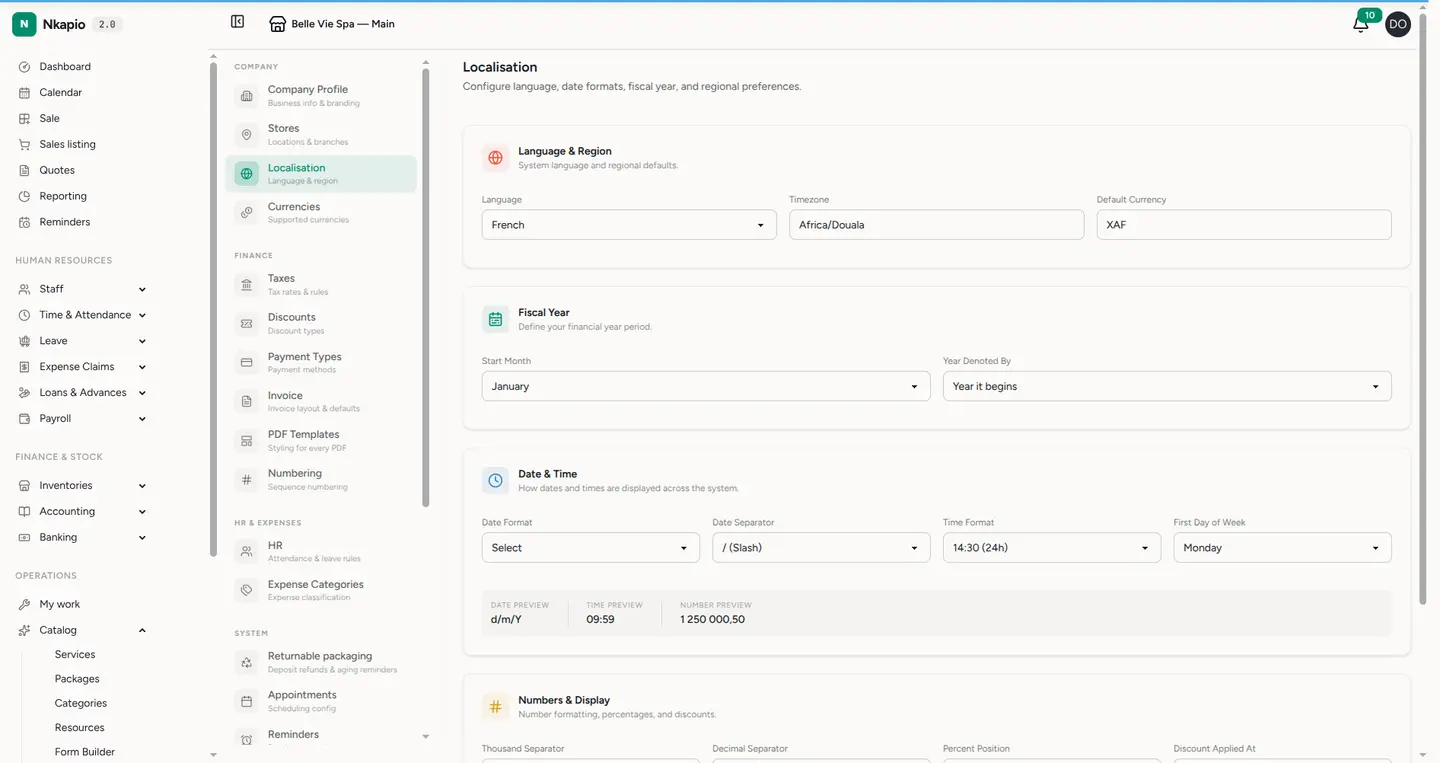
Open Localisation to confirm how numbers, dates and money are handled across the whole system:
- Language & region — interface language, timezone and default currency
(for example
XAF). - Fiscal year — the month your financial year starts and whether it's labelled by the year it begins or ends. Reports use this.
- Date & time — date format and separator, 12h or 24h time, and the first day of the week. A live preview shows exactly how a date, time and number will look before you save.
- Numbers & display — thousand and decimal separators, percent position, where discounts apply (line item, invoice total, both, or disabled), and how many rows appear per page in tables.
The calendar, reports and payroll all follow these choices, so changing the currency or a format changes how amounts and dates are displayed everywhere.
Step 4 — Configure invoicing
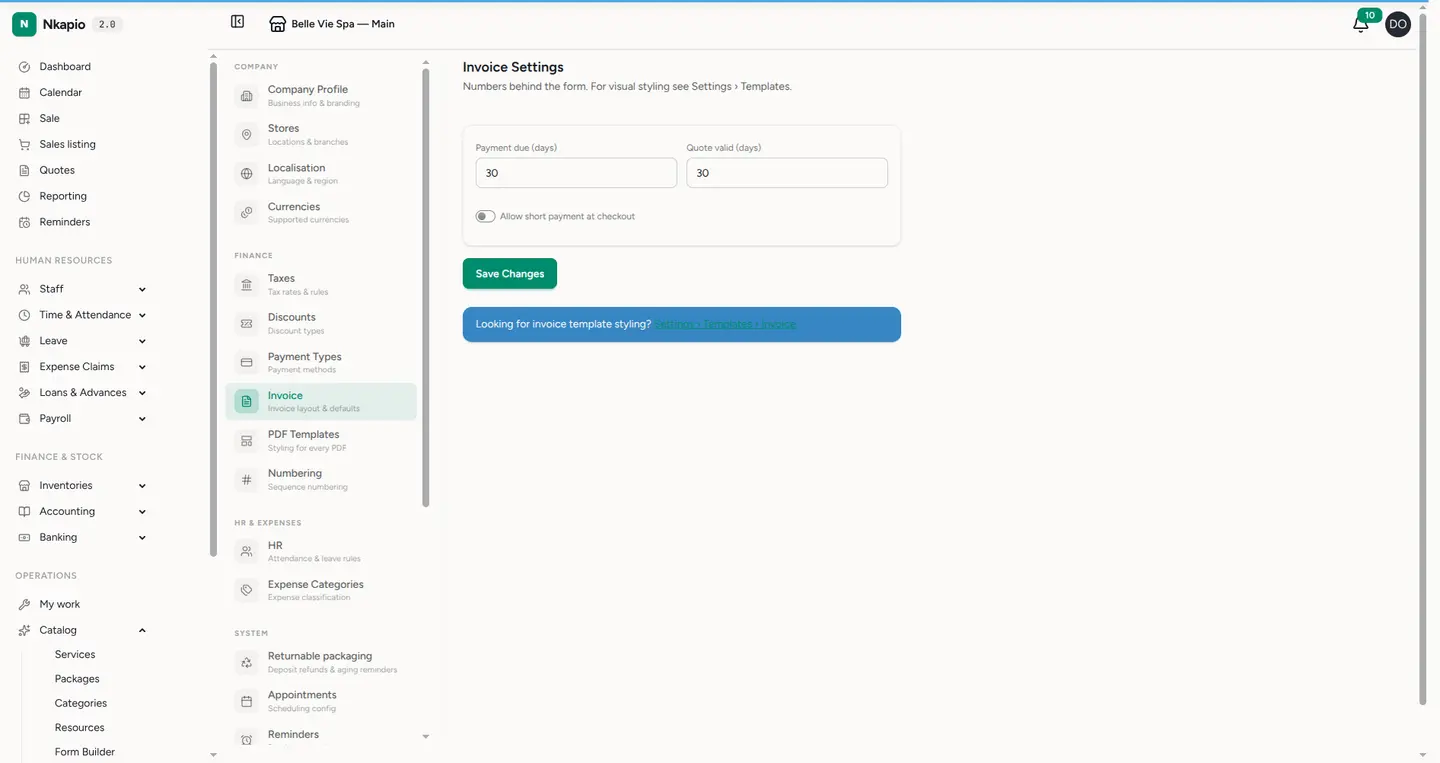
Open Invoice to set the numbers behind every document: the default payment due period (in days), how long a quote stays valid, and whether the team may take a short payment at checkout. Visual styling — colours, layout and the notes printed on each document — lives separately under Settings › Templates › Invoice.
Tip: also visit Taxes and Payment types in the same menu — they control what your team can pick at checkout.
Common questions
- Who can change these settings? The account owner, plus any role the owner grants settings access to. Everyone else can work in the app without seeing these pages.
- Will changing the currency or date format convert my old data? No — it changes how amounts and dates are displayed going forward. Set these early so your documents stay consistent.
- Where do the logo and company name show up? On your invoices, quotes and receipts. Update them in Company and every new document picks up the change.