A discount is a named, reusable reduction you set up once and reuse everywhere you sell — a staff rate, a loyalty deal, a seasonal promotion. Instead of editing a price by hand on every sale, you pick the discount from a list, and Nkapio applies it the same way each time. The result is consistent: the same "-10% Student" always means the same thing, it appears on the invoice, and it shows up in your reports so you can see what each promotion actually costs.
Discounts live in your settings, so they're usually managed by an owner or manager. Anyone taking payments can apply an existing discount at checkout — but creating, editing, or deleting the discounts themselves requires the right permission. If you don't see the Add Discount button, ask an administrator to grant you access.
Step 1 — Define your discounts
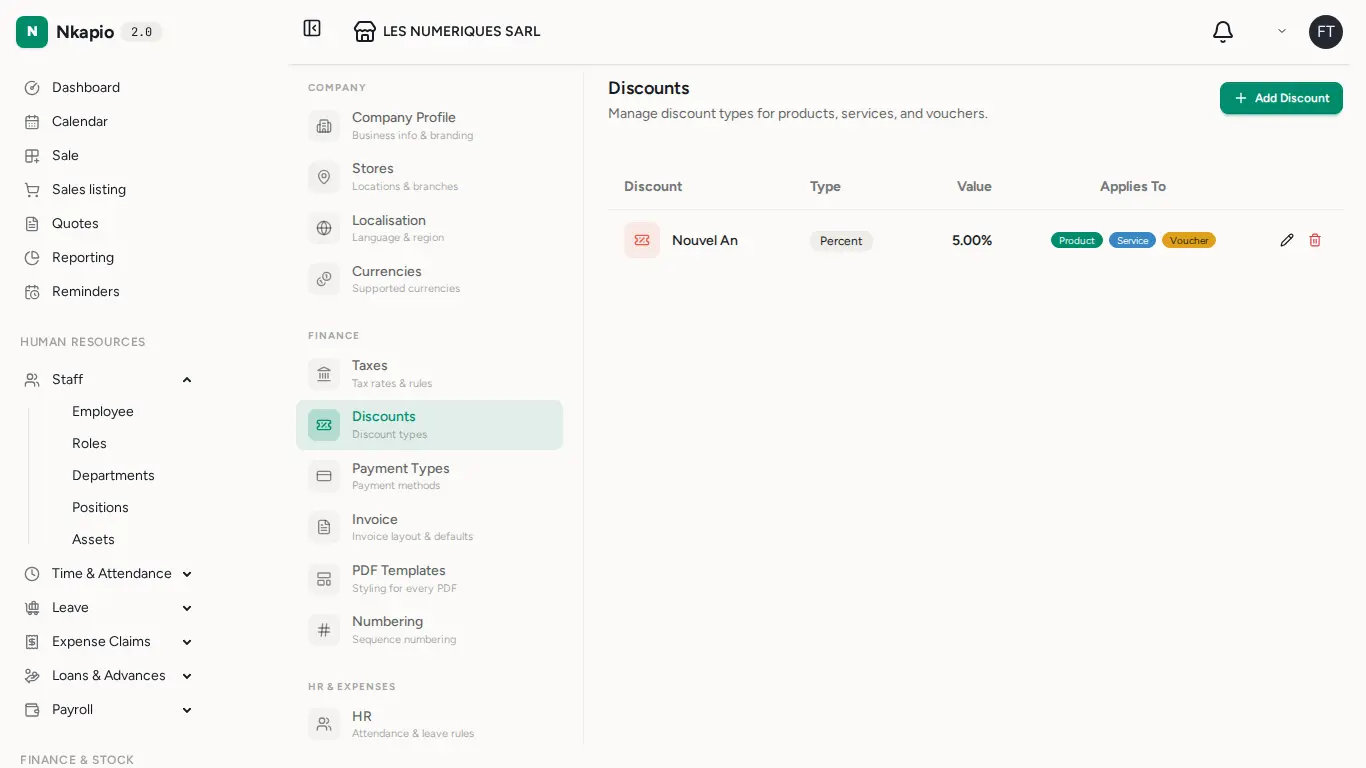
Open Setup, then Discounts, and choose Add Discount. Each discount has three parts:
- Name — how it appears on the invoice and in reports. Use something descriptive like Loyalty, Staff, or Seasonal so it's clear at a glance.
- Type and value — a percentage (for example 10, applied as −10% of the line) or a fixed amount (a flat sum taken off). The form shows a live example on 10,000 so you can confirm the reduction before saving.
- Applies To — toggle whether the discount can be used on Products, Services, Vouchers, or any combination. These toggles control where the discount can be selected, so a "Product only" deal won't accidentally get attached to a service line.
Discounts are applied per line, so a percentage is calculated against that line's amount and a fixed amount is capped at the line's value — you can never discount below zero.
Step 2 — Apply at checkout
During a sale, choose a discount on the checkout screen and pick one from your saved list. The reduction is subtracted from the amount due and the totals recalculate instantly, so the customer always sees the correct final figure.
Because discounts are reusable, there's nothing to re-type: the value, type, and scope you defined in Step 1 are applied automatically.
Step 3 — Follow the impact
A discounted sale keeps the discount on the invoice — the reduction is rolled into the invoice's total discount, so the document clearly shows both the original amount and what came off. That same information flows into your sales reports, so you can compare promotions and always know what your discounts are costing you.
Tip: prefer named discounts ("Student −10%") over editing a price by hand. A named discount is consistent across every sale and traceable in reporting; a manual price edit tells you nothing later about why the price changed.
Tips & FAQ
- Percentage or fixed? Use a percentage when the deal should scale with the price (a 10% loyalty rate); use a fixed amount for a flat "−1,000 off" offer.
- Can one discount cover products and services? Yes — turn on both toggles under Applies To and it becomes selectable on either kind of line.
- What happens if I delete a discount? It's removed from your list so it can no longer be applied to new sales. Invoices that already recorded it keep their figures unchanged.
- Why can't I add a discount? Creating and editing discounts is permission-controlled. Everyone can view and apply existing discounts, but managing the list is reserved for authorized roles.