Not everyone should see payroll, and not everyone should be able to void an invoice. Roles give each team member exactly the access their job needs — nothing more, nothing less. This keeps sensitive data private and keeps the app uncluttered: people only see the areas they actually work in.
How roles work
A role is simply a named set of permissions. A permission unlocks one action on one part of the app — reading clients, creating a booking, updating a service, deleting a product. Every team member is given a role, and that role decides what they can do.
To make roles easy to build, permissions are organised into bundles — grouped by area such as bookings, clients, inventory, finance, or HR. Toggling a bundle adds or removes all of its permissions in one click, so you rarely have to think about individual actions. Bundles are just a convenience for editing; what actually gets saved on the role is the resulting list of permissions.
Step 1 — Open Roles
In the sidebar, expand Staff and open Roles. Nkapio ships with sensible defaults, and you can add your own with New Role.
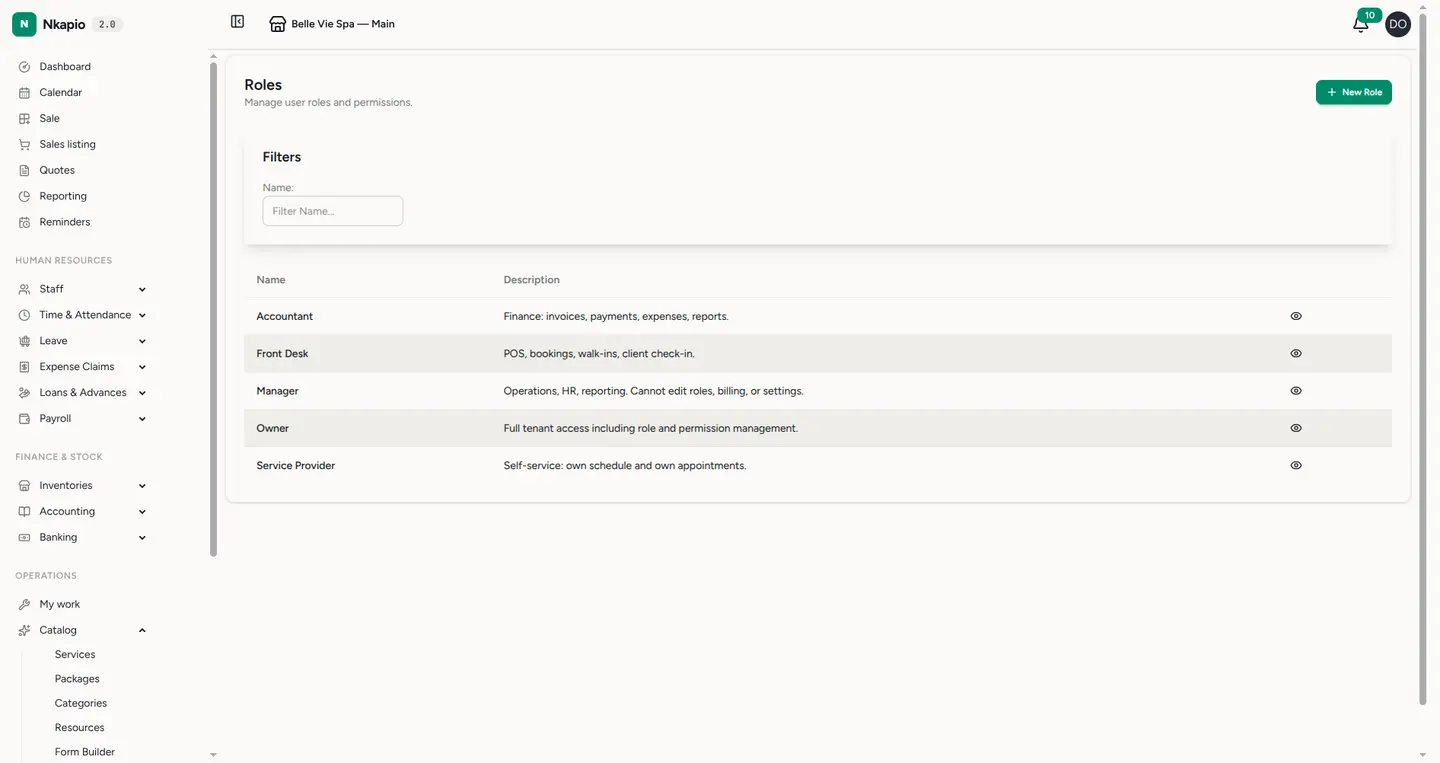
The default roles cover the most common jobs:
- Owner — full access to everything, including roles, billing, and settings. There is always exactly this one all-access role.
- Manager — day-to-day operations, HR, and reporting. Cannot edit roles, billing, or settings.
- Front Desk — point of sale, bookings, walk-ins, and client check-in.
- Service Provider — self-service access to their own schedule and their own appointments only.
- Accountant — finance: invoices, payments, expenses, and reports.
Nkapio only shows the roles that fit your business. Clinical roles such as Nurse or Dentist, for example, appear only on tenants that use the matching clinic features, so your list stays relevant to how you actually work.
Step 2 — Review a role's permissions
Click a role to open its detail. A short summary at the top shows how many modules and permissions it covers, and below that you'll see the full grid, grouped by module — what the role can read, create, update, or delete.
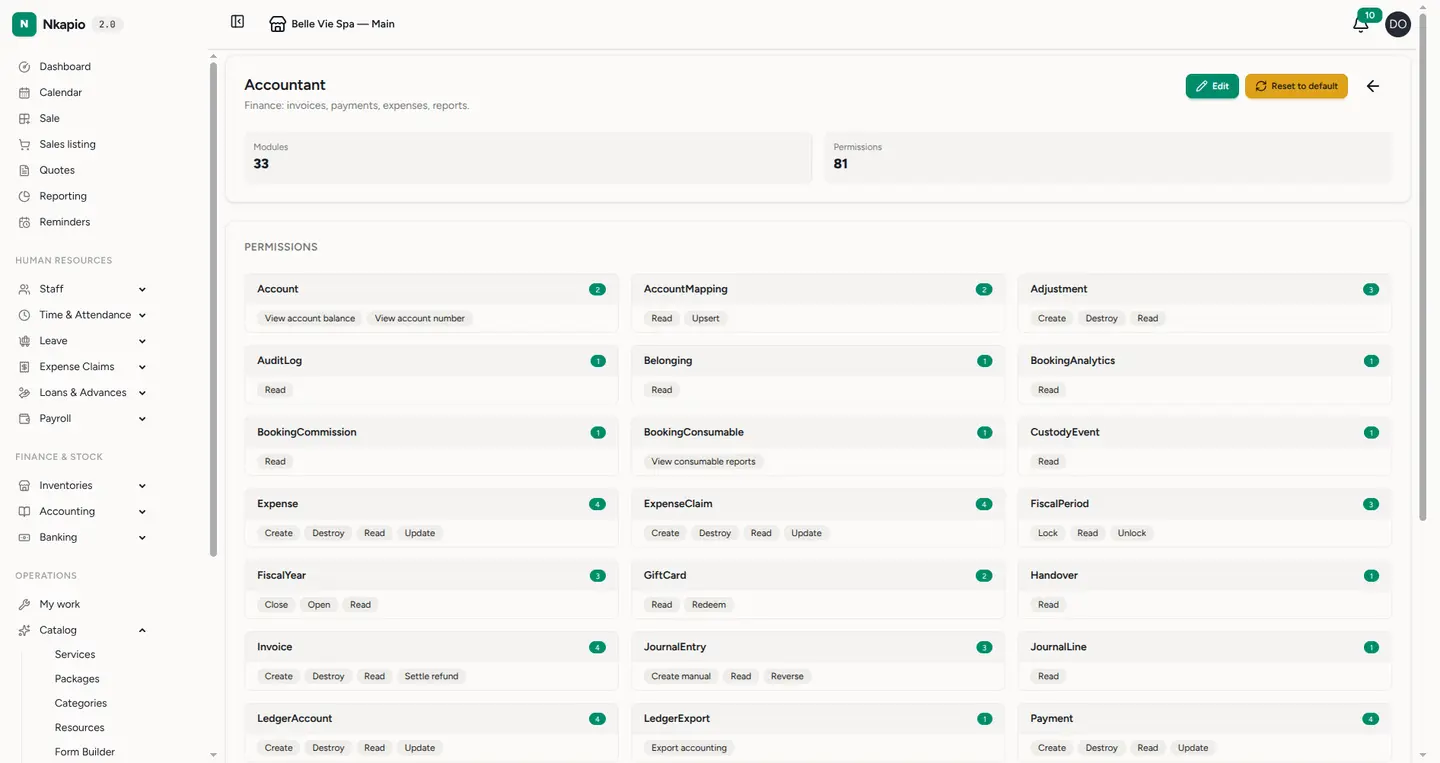
Use Edit to adjust the role: rename it, change its description, and toggle bundles on or off by area. If you've customised one of the built-in roles and want to start over, Reset to default restores the exact configuration Nkapio shipped it with. Reset is available on default roles only.
Step 3 — Assign roles to people
Each employee is given a role on their staff record. Change the role and their access updates right away — no sign-out needed. Someone with no role can't act in the app at all, so make sure every active team member has one.
Tip: create a custom role for trainees — booking and point-of-sale access, and nothing in Finance or HR.
Good to know
- The Owner role is always full access. It's kept in sync automatically and can't be reduced to a partial set — keep it for the people who genuinely run the business.
- Custom roles are never changed for you. When new features (and their new permissions) arrive, your own roles keep exactly the permissions you gave them. Revisit a custom role after a big update if you want it to include something new.
- Feature flags come first. If an area is switched off for your business, no role can reveal it — permissions only apply to features you actually use.
FAQ
A team member can't see something they should. Check two things, in order: that the relevant feature is enabled for your business, then that their role includes the matching permission.
I edited a default role and regret it. Open the role and use Reset to default to restore its original permissions.
Can two roles overlap? Yes. A person has one role, but you can build roles that share many of the same permissions — start from a similar role's bundles and adjust from there.