Onboarding is the short, repeatable routine you run whenever someone joins the team: you create their record, decide what they can see and do, and slot them into your structure. It's the job of an Owner, Manager, or anyone with staff permissions, and it usually takes a couple of minutes per person.
Done properly, onboarding does three things at once. It gives the new hire a login (they receive an email and choose their own password), it draws the boundaries of what they can access (their role and their stores), and it registers them in HR so they appear correctly in scheduling, payroll and reporting from day one. This guide is the walkthrough. For the fuller reference on each piece, follow the links at the end.
Before you start
Two things should already exist so you're not building them mid-flow:
- Roles — at least the role you'll assign. Nkapio ships sensible defaults, so you rarely need to create one first. See Roles and permissions.
- Departments and positions — if you want to place the person into your org structure straight away. See Departments and positions.
You also need staff-management permission yourself. If New Employee doesn't appear, ask an Owner to grant it.
Step 1 — Create the employee
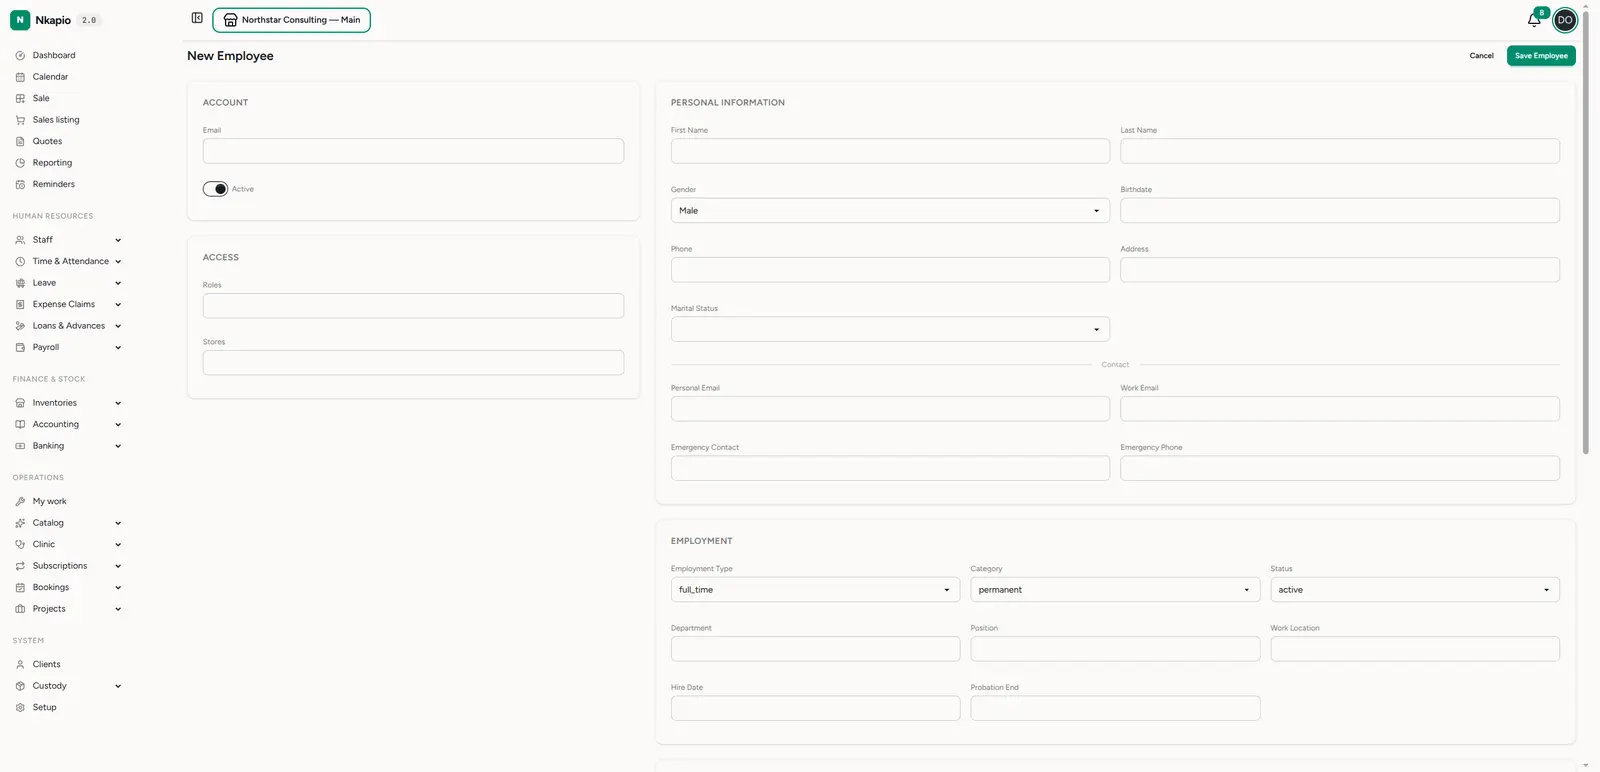
From Staff → Employees, click New Employee (/staff/users/new). The form
is grouped into cards — the two that matter on day one are at the top left:
- Account — their login email and the Active toggle. The email is where the invitation lands, so double-check it. Leave Active on unless you want to hold the account back.
- Access — the roles and stores they get. You must assign at least one store — an employee only sees and works in the stores attached to them, so this is what scopes their day-to-day view. Roles are covered in Step 2.
The remaining cards fill in the person's file and can be completed now or later:
- Personal information — name, gender, birthdate, phone, address, and an emergency contact.
- Employment — type, category, status, department, position, work location, hire date and probation end.
- Compensation, Banking & Tax — salary, pay frequency, bank details and tax IDs, ready for payroll.
Click Save Employee. The new hire now exists in your directory.
What happens after you save
Nkapio does not ask you to set a password. Instead, saving creates the account with a random internal password and emails the new hire a confirmation link. They open it, choose their own password, and their account is confirmed. Until they complete that step, they cannot sign in — so if a new hire says the app won't let them in, the usual cause is an unconfirmed account (check the invitation email hasn't been missed).
Step 2 — Give them the right role
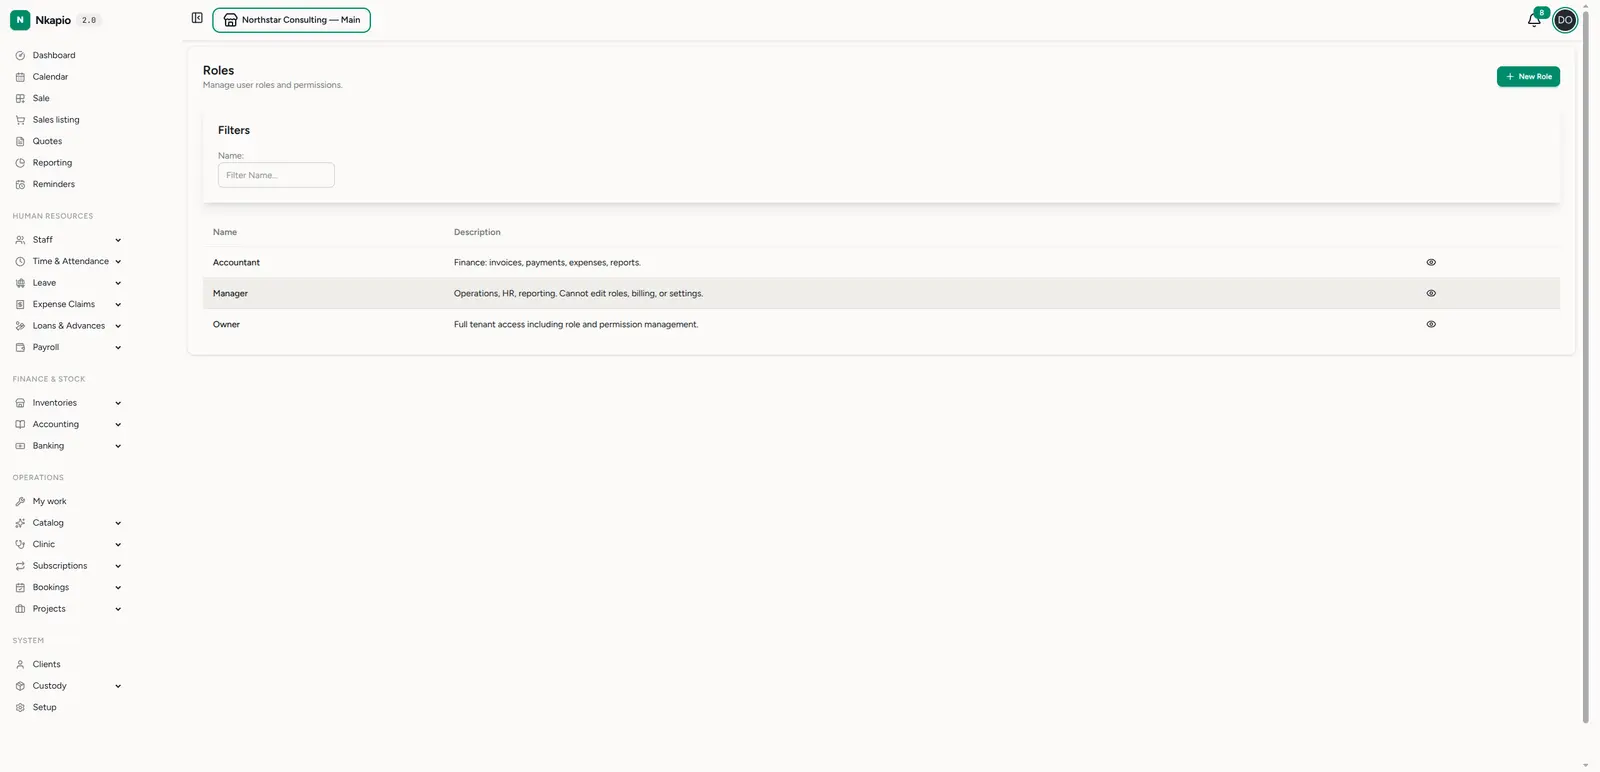
A role is a bundle of permissions — it decides what the person can see and
do. You assign roles in the Access card on the employee form; you can attach
more than one, and the person gets the combined access. Manage the roles
themselves under Staff → Roles (/staff/roles).
Nkapio ships sensible defaults so you can usually pick one and move on, for example:
- Owner — full access, including billing and role editing.
- Manager — operations, HR and reporting, but not billing or role editing.
- Accountant — finance only.
Assign the narrowest role that lets the person do their job, and only build a custom role when a real gap exists.
Least privilege. Start restrictive. It's far easier to grant more access later than to discover someone could see or change something they shouldn't.
Step 3 — Place them in a department
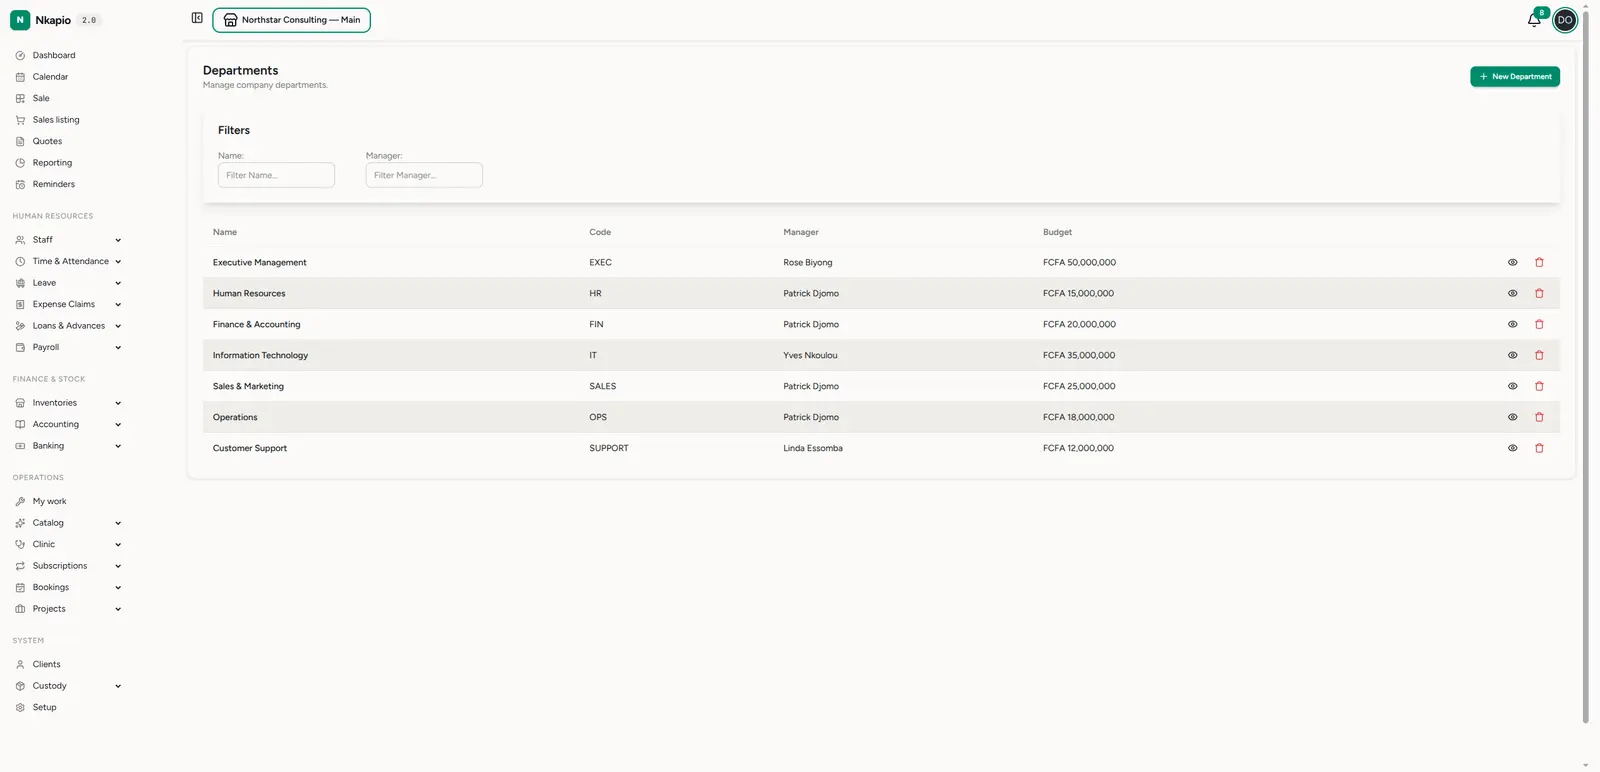
Departments group employees for structure and reporting — a well-kept department tree is what makes HR reports meaningful. In the employee form's Employment card, pick the person's Department and Position.
If the department or position you need doesn't exist yet, create it first under
Staff → Departments (/staff/departments) with New Department, then come
back and set it on the employee. Department and position are optional to save the
record, but filling them — along with hire date — is what feeds payroll and HR
reporting accurately.
What this unlocks
Once the record exists, the role is assigned and the employment details are in, the new hire is a first-class member of the workspace: they can be put on work schedules and timesheets, they're included in payroll, and their access matches their role and stores the moment they confirm their account.
Tips
- Assign stores deliberately — at least one is required, and an employee only sees and works in the stores attached to them. Add every store they should reach; leave off the ones they shouldn't.
- Reuse the default roles — they cover most needs. Only create a custom role when a default genuinely doesn't fit.
- Fill employment details early — department, position and hire date feed payroll and HR reports from the start, so it's worth a minute now.
- Check the email before saving — the invitation goes there, and a typo means the new hire never gets their confirmation link.
FAQ
The new hire can't sign in — what's wrong? Almost always an unconfirmed account. They must open the confirmation email and set a password before the first sign-in. Ask them to check spam, and confirm the email on their record is correct.
Can I set their password for them? No. For security, each person sets their own password from the confirmation link. You never see or type it.
I forgot to assign a store / role. Can I fix it after? Yes. Open the employee from Staff → Employees and edit their Access card at any time.
Do I have to fill in salary and banking right away? No. Those cards can be completed later, before you run payroll. Only the email and at least one store are needed to create the record.